All guides · Knowledge
Reading a German floor plan (Grundriss): symbols, dimensions, traps
Updated: 2026-07-12 · Reading time: 12 min · ImmoLens editorial team
Editorial & transparency
This guide was written by the ImmoLens editorial team and last reviewed on 2026-07-12. The information is for orientation and does not replace legal, tax or financial advice.
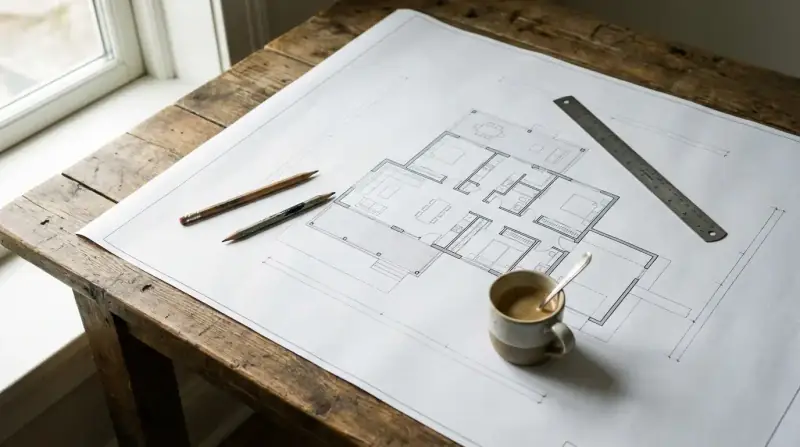
A Grundriss (floor plan) is the most important technical drawing when buying a property. It shows the layout of the rooms from above and reveals at a glance whether a flat or a house suits your lifestyle. Yet many buyers underestimate how much information a floor plan holds, and how easily you can be misled by attractive visualisations.
1. The most important floor plan symbols
Every floor plan uses standardised symbols. Once you know them, you can read any plan:
| Symbol | Meaning | What to look out for |
|---|---|---|
| Thick line | Load-bearing wall | Cannot simply be removed, limits conversion potential |
| Thin line | Lightweight partition wall | Can usually be removed (open kitchen etc.) |
| Quarter circle | Door with swing direction | Check the opening direction: does it block furniture or a second door? |
| Rectangle with an arrow into the wall | Sliding door (runs into a wall pocket) | Saves the swing area, but no pipes or cables may sit in the wall pocket |
| Thin line within a wall | Window | The compass direction determines the incoming light. The sill height is usually noted next to it |
| Square with a cross or diagonals inside a wall | Chimney / flue | Runs through every floor and is practically impossible to move |
| Small hatched rectangle next to the bathroom or kitchen | Service duct with Steigleitungen (riser pipes: waste water, water, ventilation) | The most important symbol for conversions: bathroom and kitchen depend on it |
| Narrow rectangle under the window | Radiator | No wardrobe and no sofa can go here |
| Dashed line | Element overhead (balcony, gallery, roof overhang) | Shows the upper level, possibly a lower ceiling height |
| Triangle with stairs | Staircase (the arrow points upwards) | Takes up living space on both floors |
| Arrow marked "N" | North arrow | If it is missing, half the information is missing. Ask for it |
2. Reading dimension lines: Rohbaumaß or Fertigmaß?
A dimensioned floor plan carries Maßketten (dimension chains), usually several in parallel. The outermost chain gives the overall dimensions of the building, the middle ones the axes and openings, the innermost the clear room dimensions, which is what you can actually furnish. If the dimension chains are missing and only square metre figures are printed in the rooms, you are missing exactly the information you need.
The classic trap is the difference between Rohbaumaß and Fertigmaß. The Rohbaumaß (structural dimension) describes the state without plaster, screed and floor covering. The Fertigmaß (finished dimension) is what is left after the fit-out. New-build plans often show Rohbaumaße. Reckon on around 1.5 cm of plaster per wall face: a room therefore ends up about 3 cm shorter in each direction than the plan claims.
3. Living area under the WoFlV: what really counts
Living area is not the same as floor area. Under the Wohnflächenverordnung (WoFlV, the German living area ordinance), areas count to different degrees depending on the ceiling height:
| Area | Counts towards the living area |
|---|---|
| Ceiling height of 2 m and above | fully (100 %) |
| Ceiling height from 1 m to under 2 m (sloping ceiling) | by half (50 %) |
| Ceiling height under 1 m | not at all (0 %) |
| Balcony, loggia, roof garden, terrace | as a rule by one quarter (25 %), at most by half |
| Cellar, laundry room, garage, storage room outside the flat | not at all |
What that means in practice is shown by a top-floor room with 30 m² of floor area under a pitched roof. Assume 10 m² lie below 1 m in height, 8 m² between 1 and 2 m, and 12 m² above that. Then the result is 0 + 4 + 12 = 16 m² of living area out of 30 m² of floor area. And a 12 m² balcony typically contributes only 3 m².
4. Judging room sizes and furniture space correctly
A common mistake: rooms look bigger in the floor plan than in reality. The scale 1:100 (the standard for flats) means that 1 cm on the plan equals 1 m in reality.
| Room | Minimum | Comfortable |
|---|---|---|
| Bedroom | 12 m² | 16–20 m² |
| Child's room | 9 m² | 12–15 m² |
| Living room | 20 m² | 25–35 m² |
| Kitchen | 6 m² | 10–15 m² |
| Bathroom | 4 m² | 6–10 m² |
| Hallway | 4 m² | 6–8 m² |
Square metres alone say little, though. What matters is the Stellfläche: an uninterrupted stretch of wall with no door, window or radiator. Work with these requirements and look for them in the plan:
- Bed with two bedside tables: 180 cm + 2 × 40 cm = 2.60 m of free wall.
- Three-seater sofa: a good 2.20 m, plus about 90 cm of walking space in front of it.
- Dining table for 6: The table measures roughly 90 × 180 cm. To pull the chairs out you need about 90 cm all round. The dining area therefore occupies around 2.70 × 3.60 m.
- Galley kitchen (two runs): at least 1.20 m between the runs, otherwise the oven and dishwasher doors cannot be opened while someone is standing there.
5. Why rooms look bigger on the plan
The plan shows an empty area. In reality there is furniture in it, and you have to walk between it. An item that is often overlooked is the door swing area: a room door with an 80 cm leaf sweeps a quarter circle of around 0.5 m² in which nothing may permanently stand. With four doors off a hallway, that is 2 m² that look like usable space on the plan.
The second reason is the furniture that is drawn in. Furnished sales floor plans like to draw it undersized: a "double bed" suddenly turns out to be only 140 cm wide, the sofa 1.60 m. That way every room looks generous.
6. Assessing proportions and layout
The ideal room shape is a rectangle with a side ratio of at most 2:1. Tube-shaped rooms (3:1 or narrower) are hard to furnish and feel cramped. Also pay attention to:
- Circulation routes: Is there a long hallway that "eats up" a lot of space?
- Room connections: Are the kitchen and living room directly connected? Is there an open living and dining area?
- Walk-through rooms: Do you have to pass through one room to reach another? That reduces privacy.
- Bathroom position: Is the bathroom close to the bedroom? Or do you have to go through the hallway?
- Space for furniture: Where do the wardrobe, bed and sofa go? Take radiators and socket positions into account.
7. Typical layout flaws in the plan
Some weaknesses can be solved with furniture. The following ones cannot. They are baked into the plan and you will keep them:
- Walk-through rooms: The room is only usable to a limited degree because someone is always walking through it. Practically unusable as a child's room or bedroom, and it can almost never be given its own access afterwards.
- Windowless internal rooms: The Landesbauordnungen (state building codes) require a window of a minimum size for Aufenthaltsräume (habitable rooms), often around one eighth of the room's floor area. A windowless room is therefore formally not a habitable room. It must not be counted as a room, even if the Exposé calls it one.
- Bathroom without a window: Permitted, but the moisture has to be removed mechanically. The fan has to run on, and if it fails, mould follows. A bathroom with a window forgives ventilation mistakes, an internal one does not.
- Kitchen without an external wall: The extractor hood cannot be ducted outside, leaving only recirculation with an activated carbon filter. Smells spread through the flat.
- Hallways that are too narrow: Below about 1.10 m, carrying furniture past each other becomes an exercise. For accessibility under DIN 18040-2, a hallway width of at least 1.20 m and a clear door width of 80 cm apply. If you are planning for the long term, that is the relevant benchmark.
- No free wall: A room with two doors, a window and a radiator may not have a single wall left that a wardrobe fits against. Check that before you buy, not on moving day.
8. What can be changed later, and what cannot
"We can always convert that" is the most expensive sentence in property buying. This overview shows what is realistic:
| Plan | Feasibility |
|---|---|
| Remove a non-load-bearing wall | Readily doable. But check the as-built plan first to see whether it really is non-load-bearing. In a flat it is a structural alteration that requires the consent of the owners' association. |
| Open up a load-bearing wall | Possible, but expensive: structural engineer, steel beam, usually a permit. In a flat, load-bearing walls are common property. |
| Move the bathroom or kitchen | Difficult. Waste water needs a fall. The further the WC moves away from the soil stack, the higher the floor build-up has to be, otherwise you need a lifting station. |
| Move riser pipes and service ducts | Practically impossible. They run through every floor and, in a flat, are common property. |
| Remove a chimney | Only with considerable effort, it is often tied into the structure. |
| Enlarge a window | A load-bearing external wall needs a new lintel. In a flat the façade is common property, and municipal design rules often apply on top. |
9. Compass direction and incoming light
The orientation of the windows determines how much natural light a room receives:
| South | Sun all day, ideal for the living room and balcony |
| West | Afternoon and evening sun, good for a terrace |
| East | Morning sun, pleasant for the bedroom and kitchen |
| North | Hardly any direct sun, acceptable for a study, otherwise a disadvantage |
Two things qualify this table. First, shading: a south-facing window behind a tall neighbouring wall or under a deep balcony delivers considerably less in winter, when the sun is low, than the plan promises. Second, window size: a floor-to-ceiling window facing east brings in more light than a small window facing south. Check both on the plan, the sill height is usually noted at the window opening.
10. Checklist: checking a floor plan systematically
- Are the scale and dimension chains there? Rohbaumaß or Fertigmaß?☐
- Compare room sizes with your furniture dimensions☐
- Identify load-bearing versus non-load-bearing walls (as-built plan!)☐
- Check circulation routes, door swing areas and the share of hallway space☐
- Clarify the window orientation (compass direction) and any shading☐
- Assess walk-through rooms and windowless rooms☐
- Look for free walls for the wardrobe, bed and sofa☐
- For a top floor: check the sloping ceilings and the WoFlV allocation☐
- Note the service ducts and the bathroom/kitchen positions (conversion potential)☐
- Request the living area calculation and ask which standard was used☐
11. Typical mistakes when reading a floor plan
Mistake 2, trusting 3D renderings: Some Exposés (property brochures) only show attractive 3D views instead of to-scale floor plans. Always insist on a dimensioned plan.
Mistake 3, overlooking secondary areas: Hallway, storage room and utility room are often missing from the "Wohnfläche" (living area), but they contribute to how the home feels. Check the calculation for compliance with the WoFlV (Wohnflächenverordnung, the living area ordinance).
Have the floor plan analysed
ImmoLens automatically extracts room sizes and features from Exposés, including a floor plan assessment.
Analyse an ExposéThe next step for your property
Check your listing for free with AI: renovation costs, funding programmes and risks in a few minutes. Start your analysis, or use the free tools: Closing cost calculator, Budget calculator, Viewing checklist.